This post is next in series of "Working with ADF Faces Components programmatically"
So this post is about creating client Attribute, applying it to component and setting it's value programmatically
this requirement comes in picture when user is dealing with dynamic layout means components are created programmatically at run time and it is not possible to apply clientAttribute and other properties declarative
In this i am extending my previous post -
Apply Client/Server listener to programmatically created components, apply JavaScript to ADF Faces components at run time
In previous post i have described about applying client listener and server listener programmatically
here we will see how to pass a variable value to java script function using client attribute
You can read more about af:clientAttribute here
From oracle docs-
The clientAttribute tag specifies the name/value for an attribute which will both be made available both on the server-side (Faces) component as well on on the client-side equivalent. This tag will be ignored for any server-rendered components, as it is only supported for the rich client. ClientAttributes are not synchronized to the server since unknown attributes from the client are not synchronized to the server.
Lets' see how we can do this ,It's simple just check this code -
//Code from previous post to create inputText programmatically
//http://www.awasthiashish.com/2015/05/apply-clientserver-listener-to.html
        RichInputText ui = new RichInputText();
        ui.setValue("Programmatically Created Input Text");
        ui.setId("pit1");
        ui.setContentStyle("width:200px;color:navy");
Here i am not writing code to apply client/server listener again , refer previous post for that
See the code to add client attributes to component (inputText)
        // A Set that contains all clientAttributes
        java.util.Set<String> clientAttributes = new HashSet<String>();

        // Add client attribute's name
        clientAttributes.add("clientAttribute1");
        clientAttributes.add("clientAttribute2");
        clientAttributes.add("clientAttribute3");

        //Add these attributes to a UI Compoenent
        ui.setClientAttributes(clientAttributes);

        //here assign values to client attributes
        ui.getAttributes().put("clientAttribute1", "Oracle ADF");
        ui.getAttributes().put("clientAttribute2", 9999);
        ui.getAttributes().put("clientAttribute3", "Ashish Awasthi");
So all done , now check it
For that i have used this javascript method
function demoJsFunction(evt) {
                  var comp = evt.getSource();
                  alert(comp.getProperty('clientAttribute1'));
                  alert(comp.getProperty('clientAttribute2'));
                  alert(comp.getProperty('clientAttribute3'));

                  evt.cancel();
              }
this method is called using client listener on input text and see the alert messages
First client attribute value-


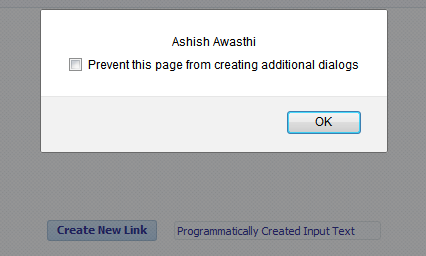
Cheers :) Happy Learning


