Please disable your adblock and script blockers to view this page

Search this blog

Showing posts with label CSS. Show all posts

Thursday 10 January 2019

Hide Icon and Heading of FacesMessage using ADF Skin

 Recently a developer asked me about how to hide the icon and heading of FacesMessage. So here I am posting a small CSS that does the trick.

Previously I have posted about resizing FacesMessage and skinning ADF Dialog component inside the popup, You can check these posts for more details about skin selectors

Check How to Show FacesMessage in Oracle ADF?

By default, Error FacesMessage in ADF Application looks like this


Now create a Skin in view controller project and write this simple piece of CSS. This CSS basically hides the header part of dialog that is used in creating FacesMessage.

  1. af|dialog::header, af|dialog::header-end, af|dialog::header-start {
  2. display: none;
  3. }

and FacesMessage looks like this


That's All

Cheers 🙂 Happy Learning

Friday 30 November 2018

Switching ADF Skin at run time using trinidad-config.xml

 This post talks about switching ADF skin at runtime and uses a managed bean variable to change skin name at runtime. Sometimes we want to use multiple themes for our application and in that case, we need this.

Created an ADF application, 2 different skins and a page in view controller project


Learn more about creating ADF skin in JDeveloper 

This page has a button to switch between skins and an outputText. Create a variable in the managed bean to hold skin name and button action listener to change skin variable value.

Here goes the managed bean code

  1. package switchadfskin.view.bean;
  2. import javax.faces.application.ViewHandler;
  3. import javax.faces.component.UIViewRoot;
  4. import javax.faces.context.FacesContext;
  5. import javax.faces.event.ActionEvent;
  6. public class SwitchADFSkinBean {
  7. public SwitchADFSkinBean() {
  8. }
  9. //Set default skin name
  10. private String skinName = "RedButton";
  11. public void setSkinName(String skinName) {
  12. this.skinName = skinName;
  13. }
  14. public String getSkinName() {
  15. return skinName;
  16. }
  17. /**Method to change skin at runtime
  18. * @param actionEvent
  19. */
  20. public void switchSkinAction(ActionEvent actionEvent) {
  21. //Change skin name
  22. if (skinName.equalsIgnoreCase("RedButton")) {
  23. this.setSkinName("GreenButton");
  24. } else {
  25. this.setSkinName("RedButton");
  26. }
  27. //Reload page
  28. refreshPage();
  29. }
  30. /**Method to refresh/reload page
  31. */
  32. protected void refreshPage() {
  33. FacesContext fctx = FacesContext.getCurrentInstance();
  34. String page = fctx.getViewRoot().getViewId();
  35. ViewHandler ViewH = fctx.getApplication().getViewHandler();
  36. UIViewRoot UIV = ViewH.createView(fctx, page);
  37. UIV.setViewId(page);
  38. fctx.setViewRoot(UIV);
  39. }
  40. }

The next step is to change the trinidad-config.xml file, set skin-family variable to refer to its value from managed bean so that when the user changes the bean variable then skin (CSS) is updated in the application.

  1. <?xml version="1.0" encoding="windows-1252"?>
  2. <trinidad-config xmlns="http://myfaces.apache.org/trinidad/config">
  3. <skin-family>#{SwitchADFSkinBean.skinName}</skin-family>
  4. </trinidad-config>

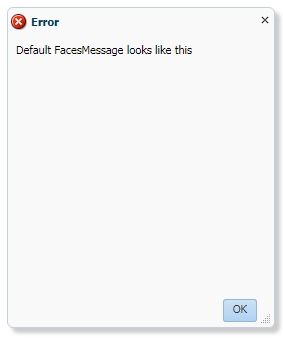
Now run and check application

The default skin is "RedButton" so it looks like this


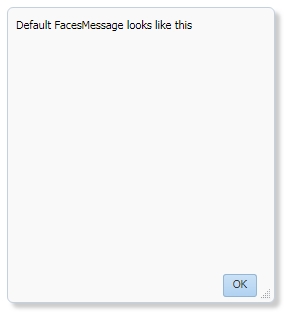
and on click of the button

Sample ADF Application (JDeveloper 12.1.3) - Download

Cheers 🙂 Happy Learning

Monday 19 November 2018

Use Font Awesome 5 Icons in Oracle ADF Application

Font Awesome is a standard icon package that has a collection of lots of beautiful customizable icons. In this post, I'll describe how to use Font Awesome 5 Icons in the Oracle ADF Application.

You can check these posts to use Font Awesome's older version 4 in ADF

Font Awesome with ADF

Leveraging Icon Fonts (Font Awesome) in Oracle ADF - 500 New Icons for your app

I suggest you try the latest version 5 as the new version is written from scratch and has many new icons pack support.

Let's start the process to use Font Awesome 5 Icons in Oracle ADF

  • Create an ADF Application and a page under view controller project


  • Now add Font Awesome CSS file reference in the page using resource tag like this
  1. <af:resource type="css" source="https://use.fontawesome.com/releases/v5.5.0/css/all.css"/>
  • Drop af:icon on the page and search for the desired icon here, click on the icon and copy icon class name and put in style class property of af:icon. See in the below image icon class name is highlighted

    and it is used in ADF page like this (here I have added 4 icons for example)


and it is used in ADF page like this (here I have added 4 icons for example)

  1. <af:form id="f1">
  2. <af:spacer width="10" height="70" id="s1"/>
  3. <af:icon name="fab fa-apple" id="i1" styleClass="fab fa-apple"/>
  4. <af:spacer width="10" height="10" id="s2"/>
  5. <af:icon name="fab fa-android" id="i2" styleClass="fab fa-android"/>
  6. <af:spacer width="10" height="10" id="s3"/>
  7. <af:icon name="fab fa-codepen" id="i3" styleClass="fab fa-codepen"/>
  8. <af:spacer width="10" height="10" id="s4"/>
  9. <af:icon name="fas fa-car-side" id="i4" styleClass="fas fa-car"/>
  10. </af:form>
  • Now run and check the application, In the below image, you can see that icons are smaller in size


  • To increase icon size append fa-5x in style class of icon, Here you can change 5x to any value like 1x,2x etc.


  • And to change color of the icon just put CSS in the inline style property of af:icon like this
  1. <af:form id="f1">
  2. <af:spacer width="10" height="150" id="s1"/>
  3. <af:icon name="fab fa-apple" id="i1" styleClass="fab fa-apple fa-10x"/>
  4. <af:spacer width="10" height="10" id="s2"/>
  5. <af:icon name="fab fa-android" id="i2" styleClass="fab fa-android fa-10x" inlineStyle="color:green;"/>
  6. <af:spacer width="10" height="10" id="s3"/>
  7. <af:icon name="fab fa-codepen" id="i3" styleClass="fab fa-codepen fa-10x" inlineStyle="color:Tomato;"/>
  8. <af:spacer width="10" height="10" id="s4"/>
  9. <af:icon name="fas fa-car-side" id="i4" styleClass="fas fa-car fa-10x" inlineStyle="color: Dodgerblue;"/>
  10. </af:form>
and icons look like this now


All done :) You can see that Font Awesome icons look much better than png images and reduce the page load time.

Sample ADF Application - Download

Cheers ðŸ™‚ Happy Learning