Please disable your adblock and script blockers to view this page

Search this blog

Showing posts with label UIComponent. Show all posts

Monday 16 April 2018

Increase Icon size of af:panelSpringBoard using ADF Skin


ADF Faces af:panelSpringBoard component shows af:showDetailItem in a fancy view using icons as the notation of showDetailItem

From Oracle Docs

The panelSpringboard control can be used to display a group of contents that belongs to a showDetailItem. An icon strip with icons representing the showDetailItem children along with the item's contents are displayed when in strip mode, and a grid of icons with no contents shown is displayed in grid mode. When the user selects an icon while the panelSpringboard is in strip mode, the panelSpringboard discloses the associated showDetailItem. When the user selects an icon while the panelSpringboard is in grid mode, this automatically causes the panelSpringboard to display in strip mode. Typically you would put one or more showDetailItem components inside of the panelSpringboard but you may also alternatively place a facetRef, group, iterator, or switcher inside of the panelSpringboard as long as these wrappers provide showDetailItem components as a result of their execution

I have added a panel springboard on the page and by default, it looks like this


Saturday 1 April 2017

OTN Question: Not able to see last record in af:table when using icons (May be a bug)


Hello All

This post is about a problem that occurs sometimes in af:table when we use icon in any column, I am not sure that it is a bug or not but sometimes table is not fully stretched on first load and last row doesn't appear properly on page but after refreshing page again problem is solved.

Monday 25 July 2016

ADF UI- dvt:bubbleChart component overview, Show data in 3 dimensions

Hello All

In ADF we have many dvt components and dvt:bubbleChart is one of them. This chart uses three measures for X-axis, Y-axis and size of bubble and looks good on UI

A good interface makes it easy for users to use application with interest, Previously I have posted a lot about ADF UI , you can read all posts here- Better UI in Oracle ADF

Wednesday 20 July 2016

ADF UI- Using New DVT Component Picto Chart in ADF 12.2.1.1


Hello All

Couple of weeks ago Oracle released new version of ADF & Jdeveloper i.e. 12.2.1.1
This release comes with many new features and data visualization components, one of them is Picto Chart

DVT Component Picto Chart is used to visualize pictorial presentation of Numbers and it uses a count attribute to present chart portion, If you need to show different types of information in picto chart then more than one count attribute can be used

Thursday 23 June 2016

ADF UI- Using New DVT Component Tag Cloud in ADF 12.2.1.1


In new relaese of Jdeveloper and ADF 12.2.1.1 many new data visualization components are introduced

Here I am talking about <dvt:tagCloud> , this component is used to represent textual data in form of tags. You must have seen tag cloud on many websites to show popular tags or patterns

So now with help of this Tag Cloud component we can create and show same type of UI. In this post I am showing how can we use tag cloud component in our ADF Application

Saturday 30 April 2016

Create ADF Choice List and apply selectItems to it programmatically

I hope we all know how to create selectOneChoice using Model layer and previously I have posted about populating selectOneChoice programmatically from bean using ArrayList

Programmatically populate values in a af:selectOneChoice component in ADF

But this post is slight different - It is about creating selectOneChoice component and applying selectItems to it programmatically
There is nothing complicated in this , Just a piece of code is required
Here I have used an ArrayList to set SelectItems and created component binding for af:form to add selectOneChoice as it's child 

Saturday 5 September 2015

Apply ValueChangeListener to programmatically created ADF Faces components

Again a post in series of  Working with ADF Faces Components programmatically
Previously i have posted about Getting value , Applying Action Listener , Applying Client/Server Listener, Creating and applying client Attributes, Setting value expression , Applying Validation to programmatically created component
Now this post post is about applying Value Change Listener to a component that is created at run time
See how to do this (Jdev 12.1.3)-
  • First created a FusionWebApplication and a page in viewController project
  • Dropped a button on page , on this button action i will create an inputText programmatically and assign Value Change Listener method reference to it
  • To create new inputText i have added following code (described in previous post)

Tuesday 1 September 2015

Apply Validator to programmatically created ADF Faces components

Again a post in series of  Working with ADF Faces Components programmatically
Previously i have posted about Getting value , Applying Action Listener , Applying Client/Server Listener, Creating and applying client Attributes, Setting value expression  to programmatically created component
Now this post post is about applying Validator to a component that is created at run time
See how to do this (Jdev 12.1.3)-
  • First created a FusionWebApplication and a page in viewController project
  • Dropped a button on page , on this button action i will create an inputText programmatically and assign validator method reference to it
  • To create new inputText i have added following code (described in previous post)

Thursday 4 June 2015

Create and set clientAttribute to ADF Faces component programmatically to pass value on client side JavaScript


This post is next in series of "Working with ADF Faces Components programmatically"

So this post is about creating client Attribute, applying it to component and setting it's value programmatically
this requirement comes in picture when user is dealing with dynamic layout means components are created programmatically at run time and it is not possible to apply clientAttribute and other properties declarative

In this i am extending my previous post -
Apply Client/Server listener to programmatically created components, apply JavaScript to ADF Faces components at run time

In previous post i have described about applying client listener and server listener programmatically
here we will see how to pass a variable value to java script function using client attribute
You can read more about af:clientAttribute here

From oracle docs-
The clientAttribute tag specifies the name/value for an attribute which will both be made available both on the server-side (Faces) component as well on on the client-side equivalent. This tag will be ignored for any server-rendered components, as it is only supported for the rich client. ClientAttributes are not synchronized to the server since unknown attributes from the client are not synchronized to the server.


Lets' see how we can do this ,It's simple just check this code -

//Code from previous post to create inputText programmatically 
//http://www.awasthiashish.com/2015/05/apply-clientserver-listener-to.html
        RichInputText ui = new RichInputText();
        ui.setValue("Programmatically Created Input Text");
        ui.setId("pit1");
        ui.setContentStyle("width:200px;color:navy");

Here i am not writing code to apply client/server listener again , refer previous post for that
See the code to add client attributes to component (inputText)

        // A Set that contains all clientAttributes
        java.util.Set<String> clientAttributes = new HashSet<String>();

        // Add client attribute's name
        clientAttributes.add("clientAttribute1");
        clientAttributes.add("clientAttribute2");
        clientAttributes.add("clientAttribute3");

        //Add these attributes to a UI Compoenent
        ui.setClientAttributes(clientAttributes);

        //here assign values to client attributes
        ui.getAttributes().put("clientAttribute1", "Oracle ADF");
        ui.getAttributes().put("clientAttribute2", 9999);
        ui.getAttributes().put("clientAttribute3", "Ashish Awasthi");

So all done , now check it
For that i have used this javascript method

function demoJsFunction(evt) {
                  var comp = evt.getSource();
                  alert(comp.getProperty('clientAttribute1'));
                  alert(comp.getProperty('clientAttribute2'));
                  alert(comp.getProperty('clientAttribute3'));
               
                  evt.cancel();
              }
 

this method is called using client listener on input text and see the alert messages
First client attribute value-

Second client attribute value-

Third client attribute value-

So this is working :)
Cheers :) Happy Learning

Friday 29 May 2015

Apply Client/Server listener to programmatically created components, apply JavaScript to ADF Faces components at run time

Hello All

This post is next in series of "Working with ADF Faces Components programmatically"
Previous posts are-

Creating dynamic layout (form and UI Component) using ADF Faces
Get Value from programmatically created components , Iterate over parent component to get child values in ADF Faces 
Apply ActionListener to programmatically created buttons/link in ADF

Now this post is about applying client listener & server listener (to execute some javascript function) to a programmatically created component (inputText, outputText etc)

Let's see the implementation part (Jdev 12.13) -

  • First created a FusionWebApplication and a page in viewController project
  • Dropped a button on page , on this button action i will create an inputText programmatically
  • To create new inputText i have added following code (described in previous posts)


  •     /**Method to add dynamically created component to a parent layout
         * @param parentUIComponent
         * @param childUIComponent
         */
        public void addComponent(UIComponent parentUIComponent, UIComponent childUIComponent) {
            parentUIComponent.getChildren().add(childUIComponent);
            AdfFacesContext.getCurrentInstance().addPartialTarget(parentUIComponent);
        }


            //Code to create af:inputText and add it to panelgroup layout
            RichInputText ui = new RichInputText();
            ui.setValue("Programmatically Created Input Text");
            ui.setId("pit1");
            ui.setContentStyle("width:200px;color:navy");
            //getParentGroupLayoutBind is the component binding of parent panel group layout
            addComponent(getParentGroupLayoutBind(), ui);
    

  • Now first part is done - Creation of input text , next is to assign client and server listener to it
    So for that first we have to add some JavaScript function in page that will be called using clientListener
    I have added this JavaScript function in page, it just fires a custom event from client and pass component value as parameter

  •         function demoJsFunction(evt){
              var comp = evt.getSource();
              alert(comp);
              AdfCustomEvent.queue(comp, "ServerEventToGetValue", {fvalue:comp.getSubmittedValue()}, true);
              evt.cancel();
            }


  • One more thing is to define server listener method in managed bean so that we can apply it to inputText at run time

  •     /**Server Listener - It will be called on execution of client side javascript
         * @param clientEvent
         */
        public void testServerListener(ClientEvent clientEvent) {
            //To get value passed from Client Event
            String val = clientEvent.getParameters().get("fvalue").toString();
            FacesMessage msg=new FacesMessage("Server Listener Called and value in inputText is - " + val);
            msg.setSeverity(FacesMessage.SEVERITY_INFO);
            FacesContext.getCurrentInstance().addMessage(null, msg);
           
        }
    

  • Now create clientListener/ServerListener programmatically and assign both to inputText
    Pass server listener method name along with managed bean name

  •         // Create new Client Listener and assign method name and type
            ClientListenerSet CL = new ClientListenerSet();
            CL.addListener("click", "demoJsFunction");
            //Add Server listener , assign client event name and resolve pre-defined serverlistener
            CL.addCustomServerListener("ServerEventToGetValue",
                                       getMethodExpression("#{viewScope.Testbean.testServerListener}"));
    
            // Add clientListener/ServeListener to inputText
            ui.setClientComponent(true);
            ui.setClientListeners(CL);
    

    Helper method to resolve expression-

        /**To Resolve ServerListener method
         * @param s
         * @return
         */
        public MethodExpression getMethodExpression(String s) {
    
            FacesContext fc = FacesContext.getCurrentInstance();
            ELContext elctx = fc.getELContext();
            ExpressionFactory elFactory = fc.getApplication().getExpressionFactory();
            MethodExpression methodExpr = elFactory.createMethodExpression(elctx, s, null, new Class[] {
                                                                           ClientEvent.class });
            return methodExpr;
    
        }
    

  • All done , now run application and check , click on button it will create a inputText
         now click on input text and see server listener is called :)

This is how we can apply javascript in programmatic created components
Cheers :) Happy Learning

Saturday 16 May 2015

Apply ActionListener to programmatically created buttons/link in ADF


This post is next in series of "Working with ADF Faces Components programmatically"
Previous posts are-
Creating dynamic layout (form and UI Component) using ADF Faces
Get Value from programmatically created components , Iterate over parent component to get child values in ADF Faces

Now this post is about applying ActionListener to a programmatically created button or link
Let's start (Jdev 12.13) -

  • First created a FusionWebApplication and a page in viewController project
  • Dropped a button on page , on this button action i will create a link programmatically and assign actionListener to it
  • To create new link i have added following code (described in previous posts)


  •     /**Method to add dynamically created component to a parent layout
         * @param parentUIComponent
         * @param childUIComponent
         */
        public void addComponent(UIComponent parentUIComponent, UIComponent childUIComponent) {
            parentUIComponent.getChildren().add(childUIComponent);
            AdfFacesContext.getCurrentInstance().addPartialTarget(parentUIComponent);
        }
    

           //Creating Link programmatically on button click     
            RichLink ui = new RichLink();
            ui.setId("li1");
            ui.setText("Programmatically Created Link");
            ui.setInlineStyle("font-weight:bold;");
            //Add this link to parent form layout
     //ParentGroupLayoutBind is the component binding of panelGroupLayout
            addComponent(getParentGroupLayoutBind(), ui);
    

  • After this we are able to create a new Link on click of button, now next is to assign ActionListener to this Link
    For this first i have to define an ActionListener method in bean. So i have added this 

  •     /**Action Listener to be applied on dynamically created button
         * @param actionEvent
         */
        public void actionForProgLink(ActionEvent actionEvent) {
            FacesMessage infoMsg = new FacesMessage("Action Listener Invoked");
            infoMsg.setSeverity(FacesMessage.SEVERITY_INFO);
            FacesContext.getCurrentInstance().addMessage(null, infoMsg);
        }
    

  • Now how to assign this ActionListener to that dynamically created Link?
    See the Code-

  •     /**Method to to resolve actionListener
         * @param actionName
         */
        private ActionListener getActionListener(String actionName) {
            //here Testbean is the name of ManagedBean
            MethodExpression methodExp = getMethodExpressionForAction("#{viewScope.Testbean." + actionName + "}");
            return new MethodExpressionActionListener(methodExp);
        }
    

    Helper method to resolve ActionListener-

        private MethodExpression getMethodExpressionForAction(String actionName) {
            Class[] argtypes = new Class[1];
            argtypes[0] = ActionEvent.class;
    
            FacesContext facesCtx = FacesContext.getCurrentInstance();
            Application app = facesCtx.getApplication();
            ExpressionFactory elFactory = app.getExpressionFactory();
            ELContext elContext = facesCtx.getELContext();
            return elFactory.createMethodExpression(elContext, actionName, null, argtypes);
        }
    

    Just pass the name of method to resolve it

       //Apply ActionListener on this dynamically created link 
        ui.addActionListener(getActionListener("actionForProgLink")); 
     
Now time to check , run application :)
First a button appears-


On click of this button a link is created -

Click on this link- programmatically assigned Action Listener is called

Cheers , Happy Learning :)

Wednesday 6 May 2015

Get Value from programmatically created components , Iterate over parent component to get child values in ADF Faces

Sometimes we need to create and add ADF Faces components at runtime , we can do it programmatically
I have posted about this before
Creating dynamic layout (form and UI Component) using ADF Faces

Now this post talks about getting value from programmatically created component, means when user enters value in those component then how to access that value in managed bean

Here i am using Jdev 12.1.3 , Let's see the implementation part

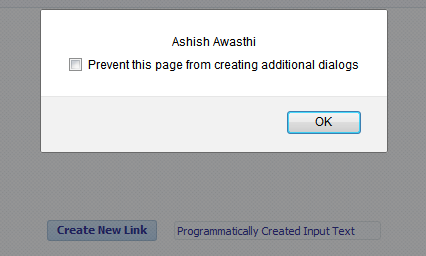
Created a page and added two buttons , one to create component at run time and second one to get values from those components
See page XML source code -

<af:document title="ProgComponent.jspx" id="d1">
            <af:form id="f1">
                <af:spacer width="10" height="10" id="s3"/>
                <af:button text="Create Components " id="b1"
                           actionListener="#{viewScope.GetValueProgCompBean.createComponentsAction}"/>
                <af:spacer width="10" height="10" id="s1"/>
                <af:button text="Get Value" id="b2"
                           actionListener="#{viewScope.GetValueProgCompBean.getValueOfCompAction}"/>
                <af:panelGroupLayout id="pgl1" layout="vertical"
                                     binding="#{viewScope.GetValueProgCompBean.parentGroupBind}">
                    <af:spacer width="10" height="10" id="s2"/>
                </af:panelGroupLayout>
            </af:form>
        </af:document>

To create components at run time i have used same approach described in above blog post
Check the code written on Create Components button


import javax.faces.component.UIComponent;
import javax.faces.event.ActionEvent;

import oracle.adf.view.rich.component.rich.input.RichInputText;
import oracle.adf.view.rich.component.rich.layout.RichPanelGroupLayout;
import oracle.adf.view.rich.context.AdfFacesContext;


    //Binding of panel group layout , it will be parent of prog. created components
    private RichPanelGroupLayout parentGroupBind;

    public void setParentGroupBind(RichPanelGroupLayout parentGroupBind) {
        this.parentGroupBind = parentGroupBind;
    }

    public RichPanelGroupLayout getParentGroupBind() {
        return parentGroupBind;
    }

    /**Method to add child components to parent
     * @param parentUIComponent
     * @param childUIComponent
     */
    public void addComponent(UIComponent parentUIComponent, UIComponent childUIComponent) {
        parentUIComponent.getChildren().add(childUIComponent);
        AdfFacesContext.getCurrentInstance().addPartialTarget(parentUIComponent);
    }

    /**Method to create Input text at run time
     * @param actionEvent
     */
    public void createComponentsAction(ActionEvent actionEvent) {
        //Create an Object of desired UI Component
        RichInputText ui = new RichInputText();
        //Set properties
        ui.setId("rit1");
        ui.setLabel("Input text 1");
        ui.setContentStyle("font-weight:bold;color:red");
        //Now add this component to any parent component
        addComponent(getParentGroupBind(), ui);

        RichInputText ui1 = new RichInputText();
        ui1.setId("rit2");
        ui1.setLabel("Input text 2");
        ui1.setContentStyle("font-weight:bold;color:red");
        addComponent(getParentGroupBind(), ui1);
    }

Now run application and click on button , you will see two inputText are created


Now to get value of these components follow the steps
1. Get Parent layout
2. Iterate over parent to get all child components
3. Get Value of every child

See the code written on get value button in managed bean

    /**Method to Iterate over parent and get value of all child components
     * @param actionEvent
     */
    public void getValueOfCompAction(ActionEvent actionEvent) {
        RichPanelGroupLayout PF = getParentGroupBind(); // Get Parent Layout
        List<UIComponent> listcomp = PF.getChildren(); // Get all child
        Iterator iter = listcomp.iterator(); // Create an Iteraotr to iterate over childs
        while (iter.hasNext()) {
            UIComponent comp = (UIComponent) iter.next(); // Get next Child Component
            System.out.println("Component is-" + comp + " and value is-" +
                               comp.getAttributes().get("value")); //Get Component detial and it's value
        }
    }

Again check , enter value in both inputText and click on button to get value


Output on console-

Sample ADF Application- Download
Cheers :) Happy Learning

Tuesday 1 July 2014

Using af:deck component to animate content in ADF 12c(12.1.3)

Hello all,
af:deck is new component introduced in ADF 12.1.3, see more detail on Oracle Docs
af:deck-Tag Referance
http://docs.oracle.com/middleware/1213/adf/tag-reference-faces/tagdoc/af_deck.html
ADF Faces Demo Server (deck demo)

As per oracle docs-
The deck component is a container that shows one child component at a time. When changing which child is displayed, the transition can be animated.
This component does not provide any built-in controls for choosing which child is displayed. Instead, you use some other component to control it. For example, you might use an external navigationPane tab bar or perhaps some external commandImageLinks to represent page progress dots. You are not limited to external controls, your deck might be displaying a series of images and you may want to put a link around each image to trigger advancing to the next image. In all of these cases, you will need to use an event handler function to change the displayed child.

So in this post i am going to show - how to use af:deck component with some animation effect?
in this post i am using 6 images to display on 6 different links


  • so designed page like this, inside deck there is 6 images, and there are 6 image links outside deck , each link is associated with managed bean actionListener 

  • <af:panelGroupLayout id="pgl4" layout="horizontal" halign="center">
              <af:link id="l1" icon="#{resource['images:circle-lblue.png']}"
                       actionListener="#{viewScope.DynamicDeckBean.link1Action}" partialSubmit="true"/>
              <af:link id="l2" icon="#{resource['images:circle-lblue.png']}"
                       hoverIcon="#{resource['images:circle-lred.png']}" partialSubmit="true"
                       actionListener="#{viewScope.DynamicDeckBean.link2Action}"/>
              <af:link id="l3" icon="#{resource['images:circle-lblue.png']}"
                       hoverIcon="#{resource['images:circle-lred.png']}" partialSubmit="true"
                       actionListener="#{viewScope.DynamicDeckBean.link3Action}"/>
              <af:link id="l4" icon="#{resource['images:circle-lblue.png']}"
                       hoverIcon="#{resource['images:circle-lred.png']}" partialSubmit="true"
                       actionListener="#{viewScope.DynamicDeckBean.link4Action}"/>
              <af:link id="l5" icon="#{resource['images:circle-lblue.png']}"
                       hoverIcon="#{resource['images:circle-lred.png']}" partialSubmit="true"
                       actionListener="#{viewScope.DynamicDeckBean.link5Action}"/>
              <af:link id="l6" icon="#{resource['images:circle-lblue.png']}"
                       hoverIcon="#{resource['images:circle-lred.png']}" partialSubmit="true"
                       actionListener="#{viewScope.DynamicDeckBean.link6Action}"/>
            </af:panelGroupLayout>
    
  • created binding for deck in managed bean , and added af:transition for back and forward animation for images

  • <af:deck id="d1" displayedChild="i1" binding="#{viewScope.DynamicDeckBean.deckBind}">
              <af:transition triggerType="forwardNavigate" transition="flipLeft"/>
              <af:transition transition="flipRight" triggerType="backNavigate"/>
              <af:image source="#{resource['images:1.jpg']}" shortDesc="Wild Life 1" id="i1"
                        inlineStyle="height:300px;width:500px;"/>
              <af:image source="#{resource['images:2.jpg']}" shortDesc="Wild Life2" id="i2"
                        inlineStyle="height:300px;width:500px;"/>
              <af:image source="#{resource['images:3.jpg']}" shortDesc="Wild Life3" id="i3"
                        inlineStyle="height:300px;width:500px;"/>
              <af:image source="#{resource['images:4.jpg']}" shortDesc="Wild Life4" id="i4"
                        inlineStyle="height:300px;width:500px;"/>
              <af:image source="#{resource['images:5.jpg']}" shortDesc="Wild Life5" id="i5"
                        inlineStyle="height:300px;width:500px;"/>
              <af:image source="#{resource['images:6.jpg']}" shortDesc="Wild Life6" id="i6"
                        inlineStyle="height:300px;width:500px;"/>
            </af:deck>
    

  • Now page looks like this


  • Refer the above links- there is a method to animate deck's child , i have used same method

  • See managed bean code for links and to animate deck child
        // Animate the display of a deck child.
        private void _animateDeckDisplayedChild(UIComponent eventComponent, int newDisplayedChildIndex) {
            // Find the nearest deck ancestor:
            RichDeck deck = null;
            String eventComponentId = eventComponent.getId();
            while (deck == null) {
                if (eventComponent == null) {
                    System.err.println("Unable to locate a deck ancestor from id " + eventComponentId);
                    return;
                } else if (eventComponent instanceof RichDeck) {
                    deck = (RichDeck) eventComponent;
                    break;
                }
                eventComponent = eventComponent.getParent();
            }
            System.out.println("Child is-" + eventComponent.getId());
            String newDisplayedChild = deck.getChildren().get(newDisplayedChildIndex).getId();
    
            // Update the displayedChild:
            System.out.println("Display Child-" + newDisplayedChild);
            deck.setDisplayedChild(newDisplayedChild);
    
            // Add this component as a partial target:
            RequestContext.getCurrentInstance().addPartialTarget(deck);
        }
    

    Code to change image and calling method to animate, here 0,1,2 are index no. of deck's children

    /**Methods to be called on different links to show different images*/
        public void link1Action(ActionEvent actionEvent) {
            UIComponent eventComponent = deckBind;
            _animateDeckDisplayedChild(eventComponent, 0);// 0 for first child of deck
        }
        public void link2Action(ActionEvent actionEvent) {
            UIComponent eventComponent = deckBind;
            _animateDeckDisplayedChild(eventComponent, 1);// 1 for second child of deck
        }
        public void link3Action(ActionEvent actionEvent) {
            UIComponent eventComponent = deckBind;
            _animateDeckDisplayedChild(eventComponent, 2);
        }
        public void link4Action(ActionEvent actionEvent) {
            UIComponent eventComponent = deckBind;
            _animateDeckDisplayedChild(eventComponent, 3);
        }
        public void link5Action(ActionEvent actionEvent) {
            UIComponent eventComponent = deckBind;
            _animateDeckDisplayedChild(eventComponent, 4);
        }
        public void link6Action(ActionEvent actionEvent) {
            UIComponent eventComponent = deckBind;
            _animateDeckDisplayedChild(eventComponent, 5);
        }
    

  • Now run application and click on links :) see how deck works
See live -how af:deck works


So Happy Learning Sample ADF Application

Monday 26 August 2013

Tree Table Component with declarative presentation in ADF, Access childs without custom selection listener

Hello all,
this is my second post on af:treeTable, first post was about creating and overriding tree table selection listener to get node value in managed bean, see
Tree Table Component in Oracle ADF(Hierarchical Representation)

In this post i am going to explain how to
  • use multiple detail column in treeTable
  • design better UI
  • manage child rows
  • use link,image,checkbox in treeTable conditionally
so i assume that you all know about creating treeTable, i am using default HR Schema (Employees ,Departments table) to master detail relation in tree and i have to show detail of Employee under Department node
  • I have created a treeTable using following details of Employees VO
  • Now on running my page it is looking like this, very odd and complex view
        xml source-

  <af:treeTable value="#{bindings.Departments1.treeModel}" var="node"
                              selectionListener="#{bindings.Departments1.treeModel.makeCurrent}" rowSelection="single"
                              id="tt1">
                    <f:facet name="nodeStamp">
                        <af:column id="c1" width="500">
                            <af:outputText value="#{node}" id="ot1"/>
                        </af:column>
                    </f:facet>
                    <f:facet name="pathStamp">
                        <af:outputText value="#{node}" id="ot2"/>
                    </f:facet>
                </af:treeTable>

  • It shows that all details of employees are clubbed in one column that is nodestamp, now to show details in different columns i have added 5 columns in treeTable, and seperate detail in each column as Email, FirstName,LastName etc
    To add column right click on treeTable and insert-
 In column drop an input text and set its value taking node reference


  •  Now run page and see, there is now 5 column with different details but still that clubbed value is shown.
  • Now to remove that clubbed detail, go to nodestamp facet of treeTable and see value of output text inside column, it is set to #{node} ,due to this all values available in node are clubbed and displayed in page, now we have to set its value to any of Master table's (Departments) attribute


  •  Now run page , only department name is displayed on header, and corresponding value for detail is blank
  •  We are done with this part, now try to make its UI somewhat better using some styles, so i have used different background color for header and detail part of treeTable conditionally
  • To do this i have set inline style property conditionally , because i have to change color of same column according to master and detail data, see condition

  • #{node.DepartmentName!=null ? 'background-color:darkgreen' :  'background-color:rgb(239,255,213);'  }
    

  • Now see how to get selected child row without over-riding treeTable's selection listener, to do this i have added a image link in treeTable and created a action listener on that to show current selected detail row
  • Bind tree table to managed bean and create two methods to get selected RowIterator and node Key

  •     /**Tree Table Binding in managed bean*/
        private RichTreeTable treeTabBind;
    
        public void setTreeTabBind(RichTreeTable treeTabBind) {
            this.treeTabBind = treeTabBind;
        }
    
        public RichTreeTable getTreeTabBind() {
            return treeTabBind;
        }
    
        /**Method to get Iterator*/
        public RowIterator getSelectedNodeIterator() {
            if (getTreeTabBind() != null && getTreeTabBind().getSelectedRowKeys() != null) {
                for (Object rKey : getTreeTabBind().getSelectedRowKeys()) {
                    getTreeTabBind().setRowKey(rKey);
                    return ((JUCtrlHierNodeBinding)getTreeTabBind().getRowData()).getRowIterator();
                }
            }
            return null;
        }
    
        /**Method to get Node Key*/
        public Key getSelectedNodeKey() {
            if (getTreeTabBind() != null && getTreeTabBind().getSelectedRowKeys() != null) {
                for (Object rKey : getTreeTabBind().getSelectedRowKeys()) {
                    getTreeTabBind().setRowKey(rKey);
                    return ((JUCtrlHierNodeBinding)getTreeTabBind().getRowData()).getRowKey();
                }
            }
            return null;
        }
    

  • Now to get currently selected node and row pass Iterator and Node key in this method- see

  •     public void showCurRowDetail(RowIterator ri, Key selectedNodeKey) {
            Row[] rows = ri.findByKey(selectedNodeKey, 1);
    
            FacesMessage msg = new FacesMessage(rows[0].getAttribute("FirstName") + "'s data available in this row");
            FacesContext.getCurrentInstance().addMessage(null, msg);
        }
    

  • Now Run application and click on link to see selected row -